To avoid illumination problems, you can include pre-computed cache files (.gi, .gi2, .gil, .gir) that you have already prepared on your system. You must put the cache files in your project directory, in a sub-directory called illum (or use the Custom Location feature of C4D).
How to calculate the pre-pass
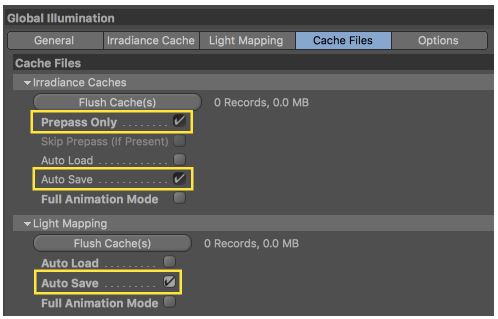
1. Pre-pass settings: Save
By default, cache files are written in the illum folder, in the project folder.
2. Run a render
Unlike VRay, you have to render the prepass for all the frames at the final resolution.
Cinema 4D documentation
The following basic rule applies to saved/loaded cache files: They can only be used for a non-modified project. As soon as crucial geometry, materials, lights or even GI settings are modified, the data saved in the cache file will no longer be valid and a new cache should be calculated. Otherwise faulty renderings will result.
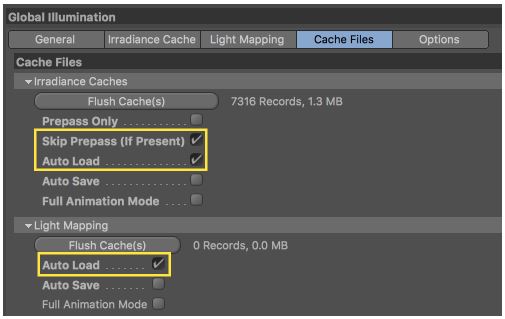
3. Pre-pass settings: Load
4. Run RANCHecker
Still images
The prepass file is mandatory for still image rendering with Irradiance Cache. Please see the Still Images recommendations for further details.
Flythrough animation
The prepass file is not mandatory but you can use one as:
It reduces flickering (with Full Animation Mode disabled)
It lowers the rendering time on the Ranch
With Full Animation Mode disabled, a single cache file is used for the entire animation, which saves memory.
Moving objects
You have to enable Full Animation Mode to generate a cache file for each frames.
Pre-calculating the cache using Full Animation Mode is only useful to lower the rendering time on the Ranch, it will not reduce flickering.
VRay for C4D
Still image
The pre-pass cache file (.vrmap) is mandatory when using Irradiance Map. Please refer to the Still Images recommendations for further details.
Flythrough animation
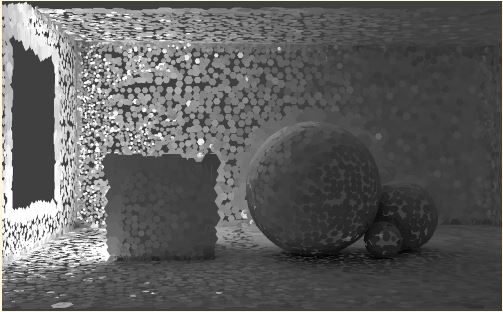
It is possible to render a flythrough animation using Irradiance map on the Ranch without any pre-pass cache files but you take the risk to have flickering on your final render, as illustrated on the animation below.
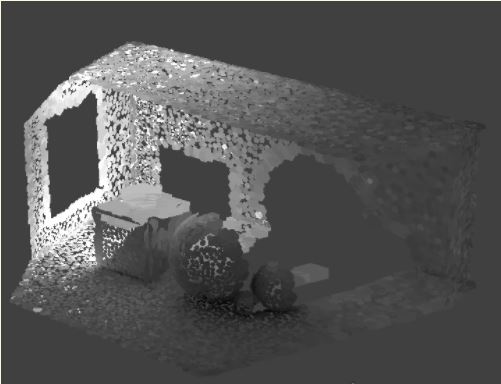
Here is the same animation rendered with a pre-calculated .vrmap:
Thanks to the .vrmap pre-pass file, all the servers use the same pre-pass instead of calculating their own for each frame.
How to calculate the pre-pass
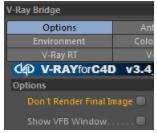
1. Disable render (Options > Don’t render final image)
2. Set Mode to Multiframe Incremental
3. Run a render
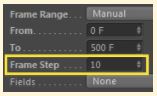
TIP You can set a frame step to speed-up the pre-pass calculation.
As the Irradiance map is view-dependent, you need to render each camera angles.
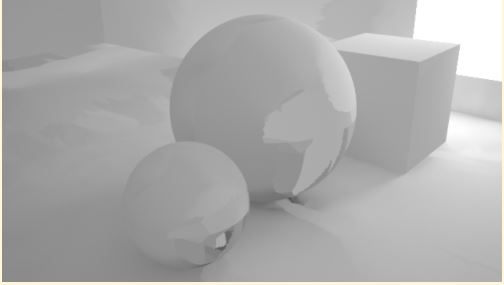
Here is a vrmap rendered from one camera angle:
If you move the camera, the render will be incorrect as there is only one angle pre-calculated:
Here is a render from behind using this vrmap:
Hence, the frame step used to render the vrmap depends of the speed of the camera. If your camera moves fast, the frame step should be low to make sure all camera angles are covered.
4. Set Mode to From File
5. Re-activate the render
TIP If you want to avoid any pre-pass calculation on your machine(s), your can also use the Animation prepass / render mode for a flythrough animation. Please see the next section Moving Objects for further details.
VRAY for C4D Manual – Multiframe Incremental
This mode is useful when rendering a sequence of frames (not necessarily consecutive) where only the camera moves around (so-called fly-through animations). VRAYforC4D will compute a new full-image irradiance map for the first rendered frame; for all other frames VRAYforC4D will try to reuse and refine the irradiance map that has been computed so far.
Single Frame (one pre-pass per frame/server):
Multiframe Incremental (one pre-pass for all frames/servers):
Moving objects
We recommend using the Animation Prepass / Render mode for all animation using Irradiance Map as a way to eliminate flickering and improve fluidity.
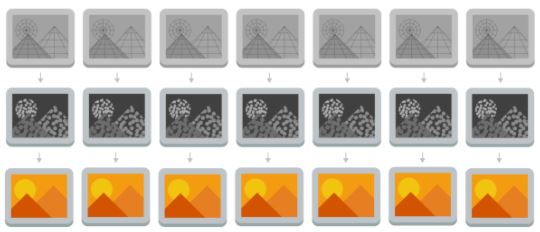
Single Frame pre-passes:
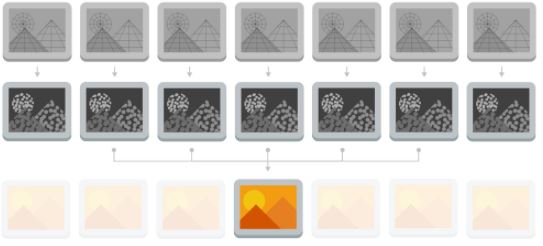
Animation Prepass / Render:
The Ranch takes care of all pre-passes setup and calculation (using your GI settings). To select this method, simply enable Mode Animation Prepass / Render in RANCHecker V-Ray options.
When the project is processed on the Ranch, a pre-pass file will be computed for each frames and then the rendering phase will use the previously computer .vrmap files. The rendering of one frame will interpolate 5 pre-pass files to smooth the GI: the two previous frames, the current frame and the two next frames.
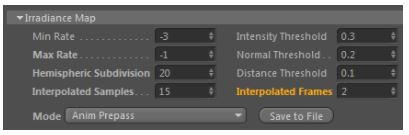
You can configure how many pre-pass files are interpolated during the rendering phase. The Interpolated Frames parameter defines how many previous and next frames are interpolated for the rendering.
Please note that: During the render, the first 50% of progress displayed in the Ranch Waiting List will correspond to the Prepass phase, and 51 to 100 % will correspond to the Rendering phase.
VRay for C4D Manual
Animation prepass – in this mode VRAYforC4D calculates irradiance maps to be used later on for final rendering with the Animation (rendering) mode. One irradiance map is created for each frame and written into a separate file. Note that in this mode you have to render one map for each frame (i.e. you cannot render every Nth frame). VRAYforC4D automatically disables rendering of the final image in this mode – only irradiance map prepasses are calculated.
Animation render – in this mode VRAYforC4D renders a final animation using irradiance maps created with the Animation (prepass) mode. Irradiance maps from several adjacent frames are loaded together and blended to reduce flickering. The number of irradiance maps that are interpolated is determined by the Interp. frames parameter.
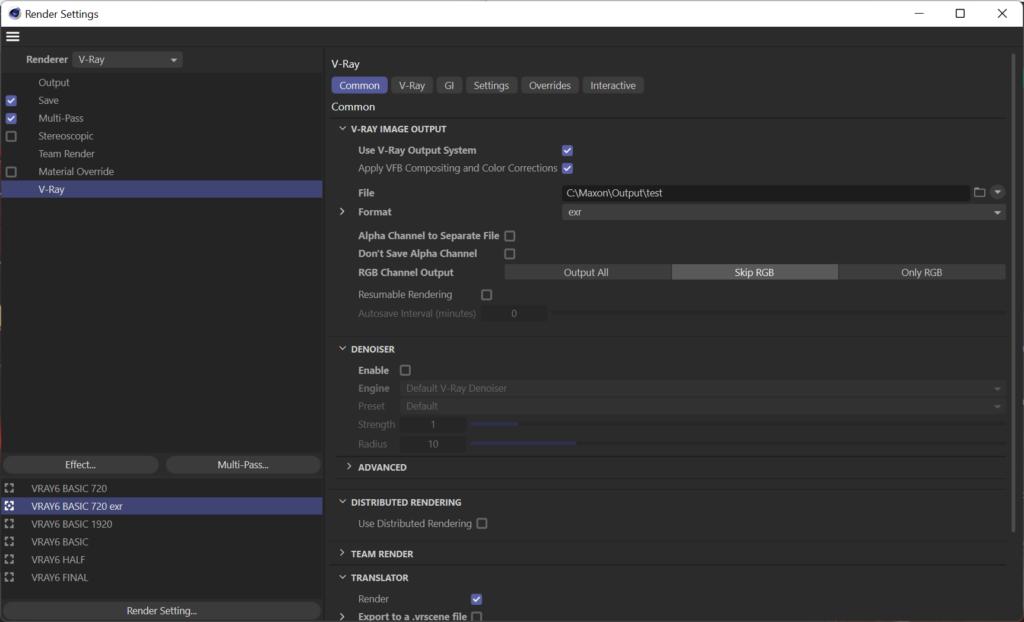
Warning Please note that on the RANCH, the “Use Vray Output System” option in Vray is not supported. Ensure this option is disabled in your project settings to avoid any rendering issues.
Arnold
As indicated in the Arnold documentation, the best is to use .tx for all texture files.
You can follow these instructions to convert your textures to .tx files.
Warning Not using .tx textures can lead to longer rendering times, lower CPU usage and heavier RAM usage.
Supported on the Ranch:
AOV drivers
.tx gathering (even if original texture path are used in the materials)
Arnold procedural (.ass)
RANCHecker will gather all the assets referenced with absolute path in .ass files.
Octane
We strongly recommend that you use the same version of Octane as Ranch Computing to maximize your chances of successful rendering and to avoid bugs. Resetting the render settings is required after updating the render engine to remove the previous version residues.
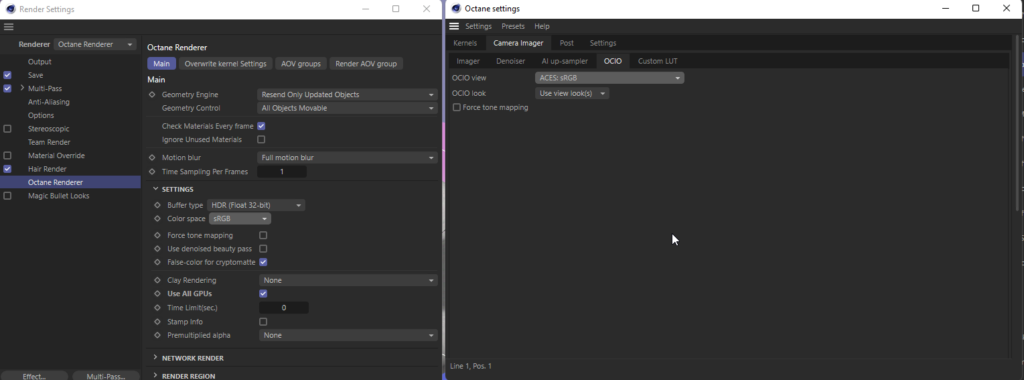
OCIO
When using Octane Render on the render farm, OCIO configurations do not work at the moment, due to technical limitations. It is therefore impossible for RANCHecker to make the desired adjustments to your project. So you must use the sRGB configuration to get around this limitation.
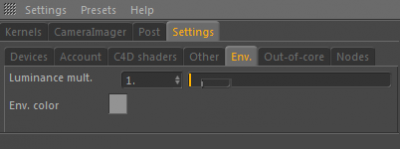
Environment
As the Cinema 4D Octane plugin stores the environment color in the user preferences and not in the scene file, you must use a sky object to override the default environment color.
Note: the “Use RTX acceleration” option is well supported on the RANCH’s servers!
2D Effects
Octane render 2D effects are not supported for Multiband rendering.
You can read the Still Images recommendations to understand how still images are processed on the Ranch.
If you enable a 2D effect (vignetting, glare, bloom), it will be applied on each rendered strip instead of the whole image.
If you use glare, it will be applied only on the strips generating the glare, Octane is not able to add glare on off-camera objects.
For still image rendering, we recommend choosing the Single node option on the RANCHecker.
Redshift
Warning Please note that on the RANCH, Redshift’s folder generation feature is not supported. Ensure this feature is disabled in your project settings to avoid any rendering issues.